When you reference the Veeam Hardened Repository ISO, you’ll note that the word “hardened” is in there. What makes the VHR “hardened”? I’ve touched on this before, but Veeam makes use of STIG’s to harden the OS to the DISA recommendations. One of those functions used to harden the OS is USBGuard. And what is USBGuard? It’s a service used to define a list of authorized USB devices that can connect to a machine.
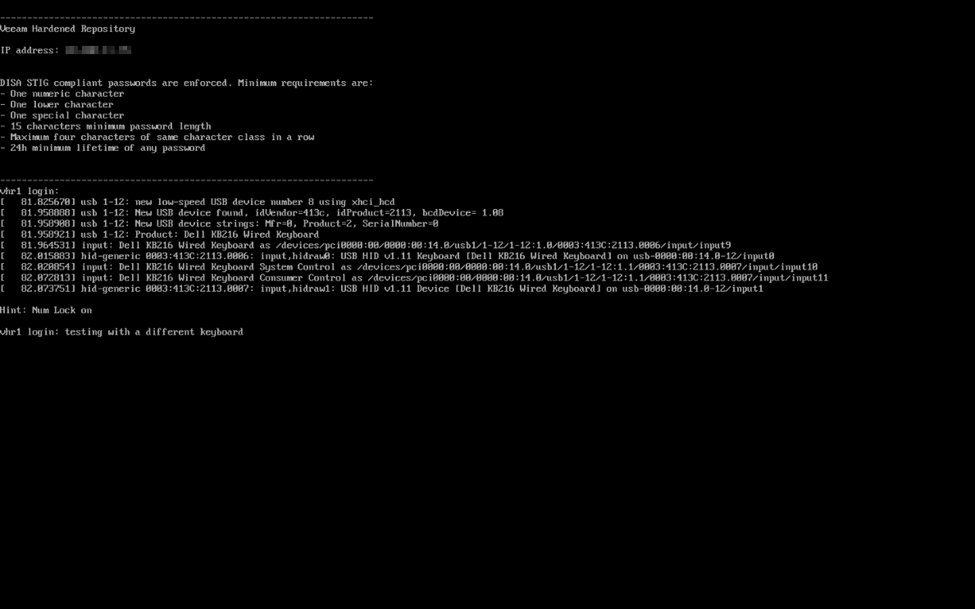
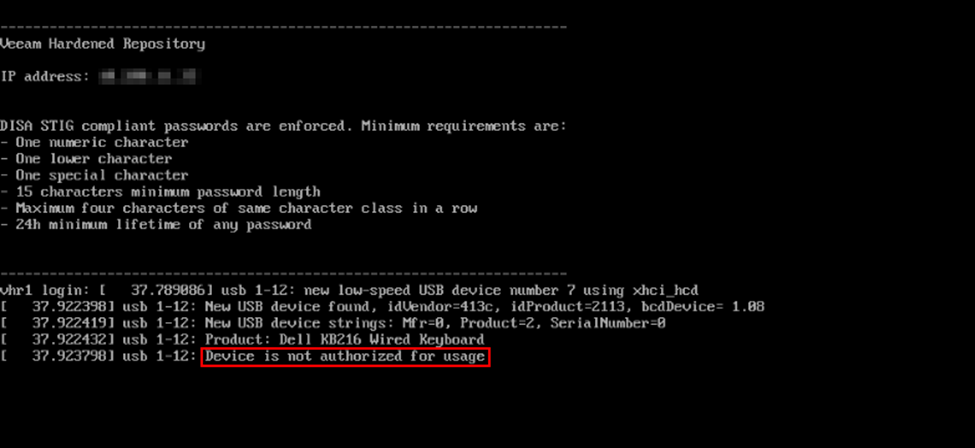
In the case of the VHR ISO, USBGuard will authorize devices that are attached to the server when the ISO is deployed. In the case of most of the machines I’ve setup, that’s going to be the Dell IDRAC virtual keyboard and mouse and any USB keyboards and/or mice (and possibly USB hubs/KVM’s) that happen to be plugged in. In most cases, I’m staging a server to be deployed to a client and the keyboard and mouse will not be going with the server. In the case where I first discovered USBGuard, I deployed the ISO at the local console without the IDRAC virtual console opened, meaning that the IDRAC virtual keyboard and mouse were not connected when the VHR was deployed, and was therefore not authorized to connect. This is especially problematic if you deploy the VHR to a machine that doesn’t even have a virtual console via out-of-band management such and IDRAC or ILO (teaser for a future post). Furthermore, USBGuard also restricts the authorized keyboard to a specific USB port. If you plug the correct keyboard into the incorrect USB port, you’re still unable to use that keyboard until it’s moved to the correct port. So if you plug in an unauthorized device, or plug an authorized device into the wrong USB port, you’ll be greeted with an error like the one below.
After submitting a feature request and having some further discussions in the R&D Forums with Hannes Kasparick who is the mastermind behind the VHR ISO and has probably spent countless hours in its development, Hannes had a few suggestions but noted there wasn’t really an easy way to authorize additional devices after the VHR had been deployed. He did note that if you were to boot the VHR into single user mode, you could probably uninstall USBGuard. We both didn’t love the idea of completely disabling USBGuard, but he also noted that the new VBR v13 VHR appliance will be subjected to the same restrictions and others users of the current VHR ISO have had the same complaint. In my case, I wanted USBGuard to be enabled for the security hardening factor, but just to allow all USB keyboards (and mice) to be authorized devices.
It’s not hard to authorize certain device types in USBguard. Simply modify the rules.conf configuration file found at /etc/usbguard/rules.conf as noted here and here. However, since the VHR is hardened, you don’t get root access to edit the file at the console, nor if you enable SSH and SSH into the appliance. Whitelisting certain device types via single user mode is going to make the most sense here.
So let’s take a look at what the effort is to make this all work.
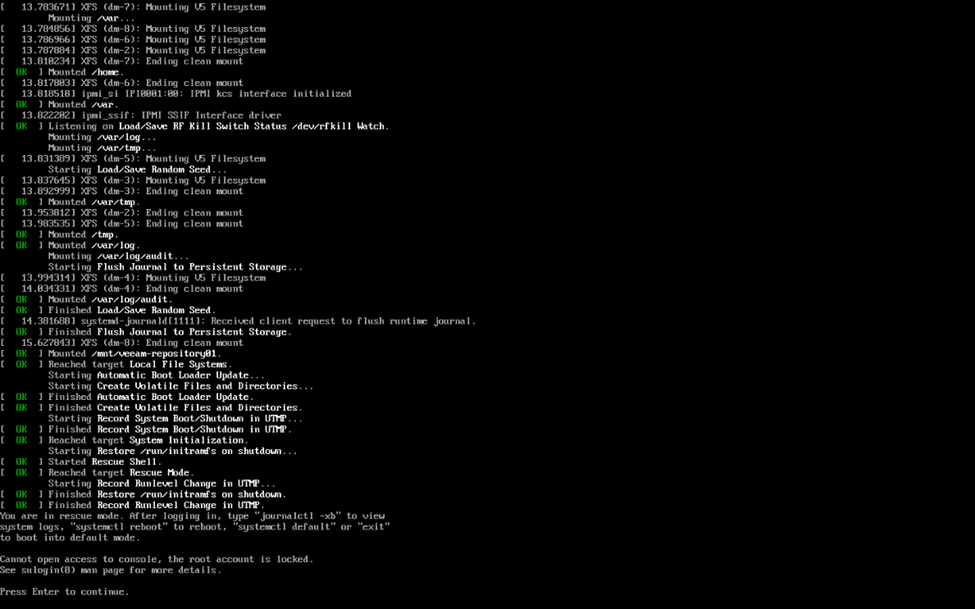
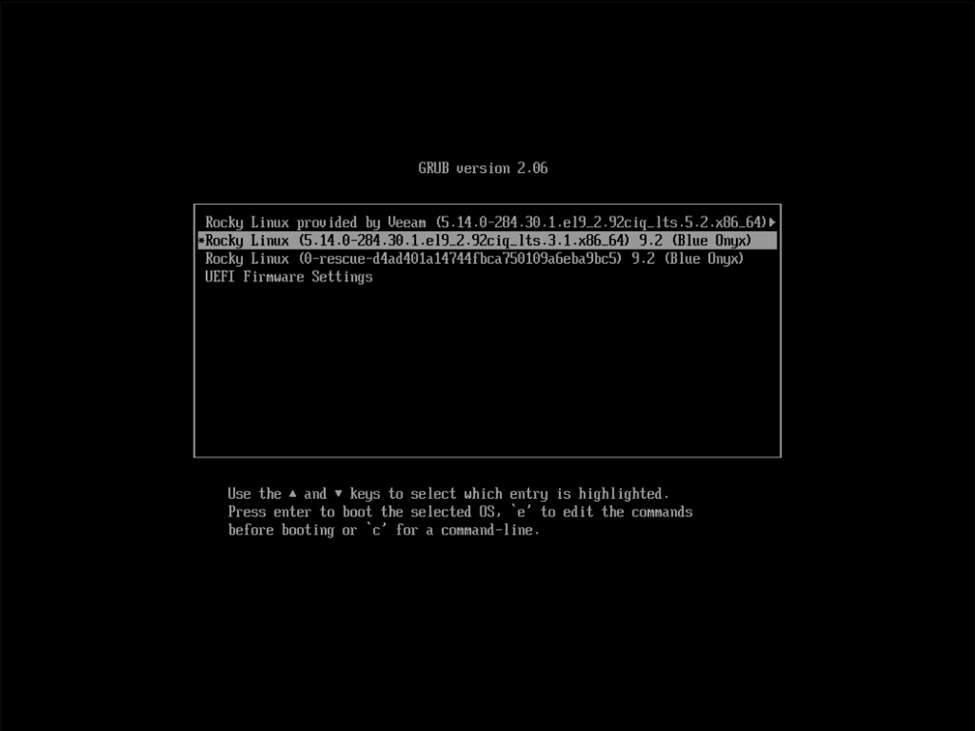
First things first, you’ll need to boot your VHR into single user mode. For those not familiar, at the GRUB boot loader, you simply select the desired entry in GRUB and press “e” to edit the boot command. Normally this will be the first entry in GRUB, but in my case, it appears that one of the VHR’s update added an additional entry where I wasn’t able to boot single user because root was not authorized and I wasn’t able to start the shell – more on that in a bit. My initial search results indicated that just adding a “1” at the end of the first line that starts “linux” and then pressing Ctrl-X to continue booting with the modified command should boot to single user mode, but instead this resulted in an error stating that the console could not be accessed because the root account was locked.
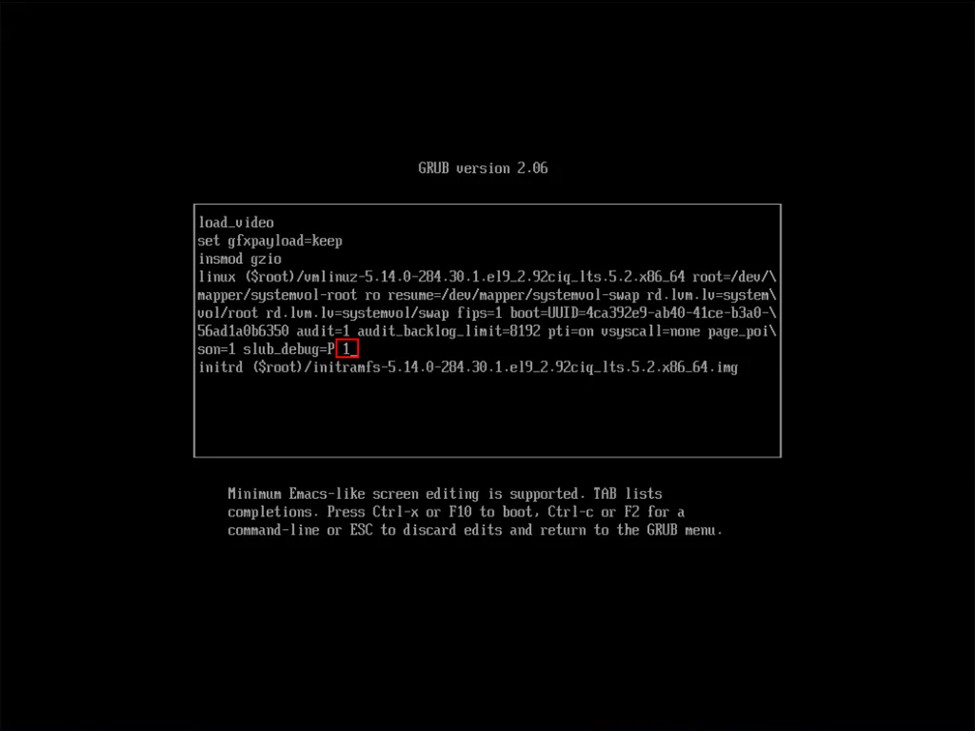
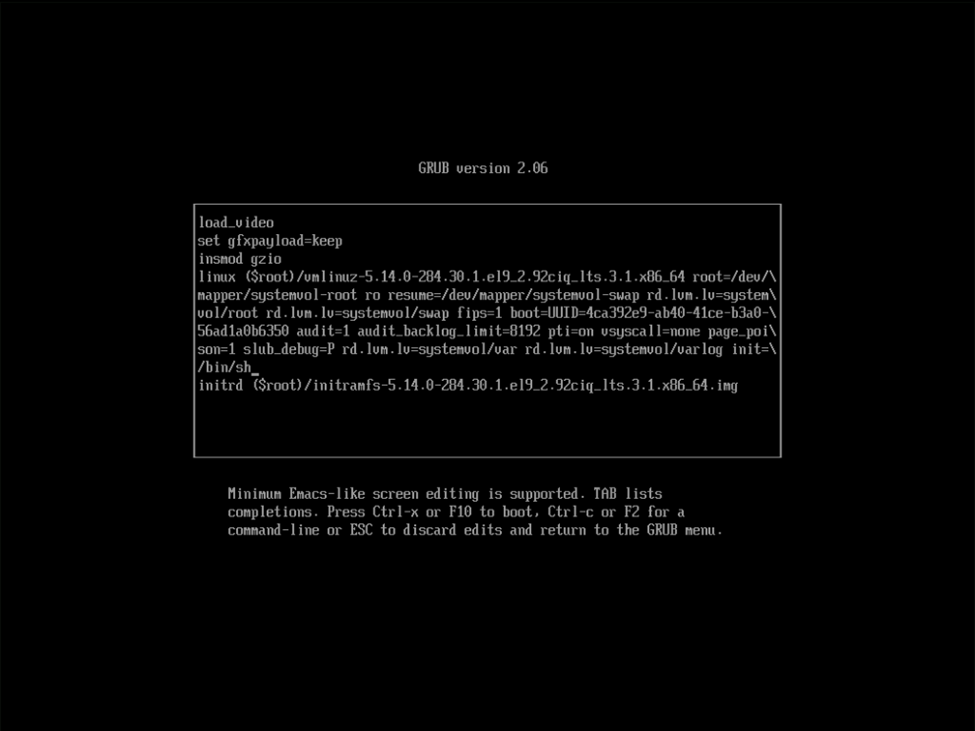
After a quick search, I came across KB4663 which had instructions on the proper entry to make to boot the VHR to single user mode (in this case, to reset an account lockout of vhradmin or veeamsvc). In this case, you are instructed to add rd.lvm.lv=systemvol/var rd.lvm.lv=systemvol/varlog init=/bin/sh . That said, attempting on the first entry seen below resulted in the OS still booting what appeared to be normally.

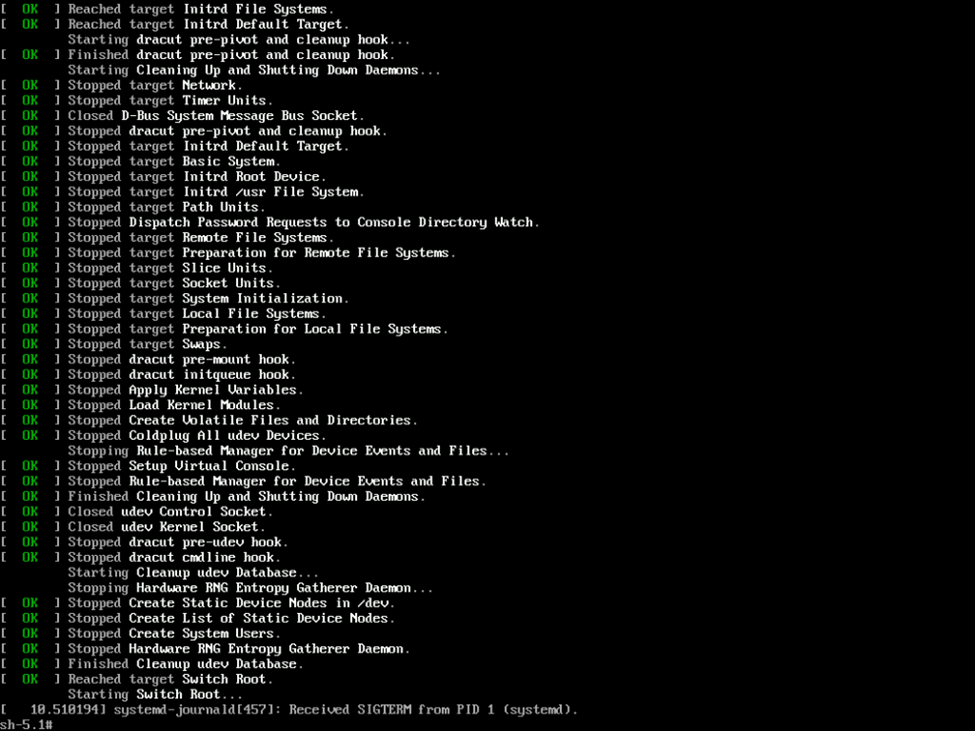
As they say, the third time’s the charm. This time I highlighted the second (original) entry in GRUB, pressed “e” to edit the line, and added the same modification of rd.lvm.lv=systemvol/var rd.lvm.lv=systemvol/varlog init=/bin/sh to the boot command as seen below, pressed Ctrl-X to continue booting and this time was rewarded with the single user shell.
On to the next challenge. The KB also noted that you need to mount the /var and /var/log devices using the below command. In my case, I don’t think I needed to, but I did it anyway.
mount /dev/mapper/systemvol-var /var
mount /dev/mapper/systemvol-varlog /var/log
However, what I did find is that when I initially used vi to edit /etc/usbguard/rules.conf, I was notified that the file was readonly and I’ll note that issuing a “force write” command as :w! still resulted in the file being read-only.
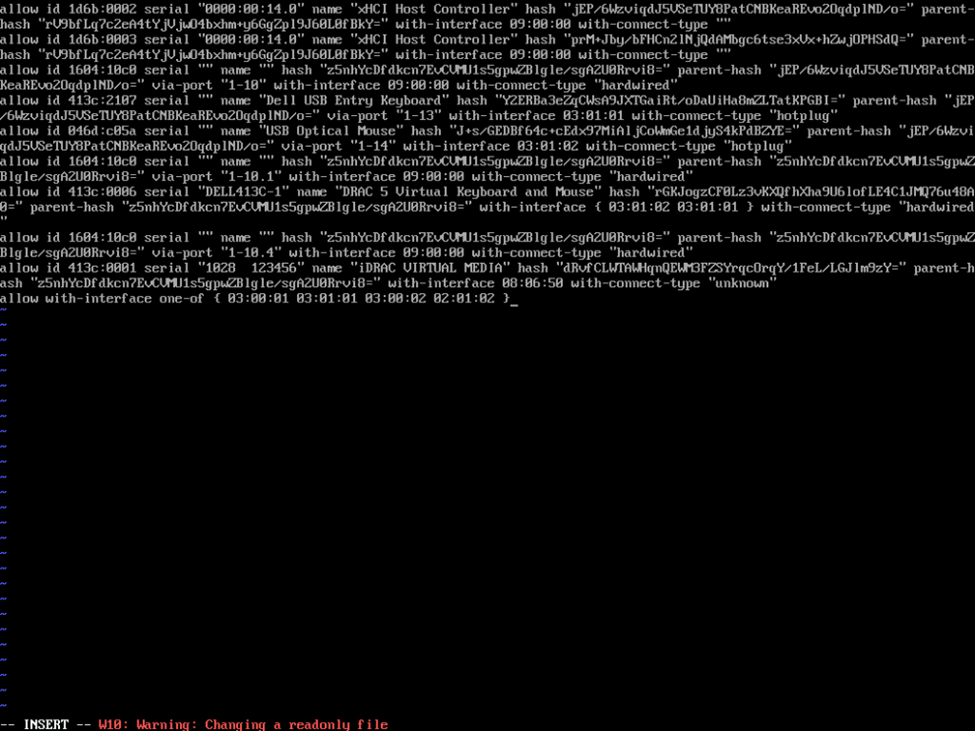
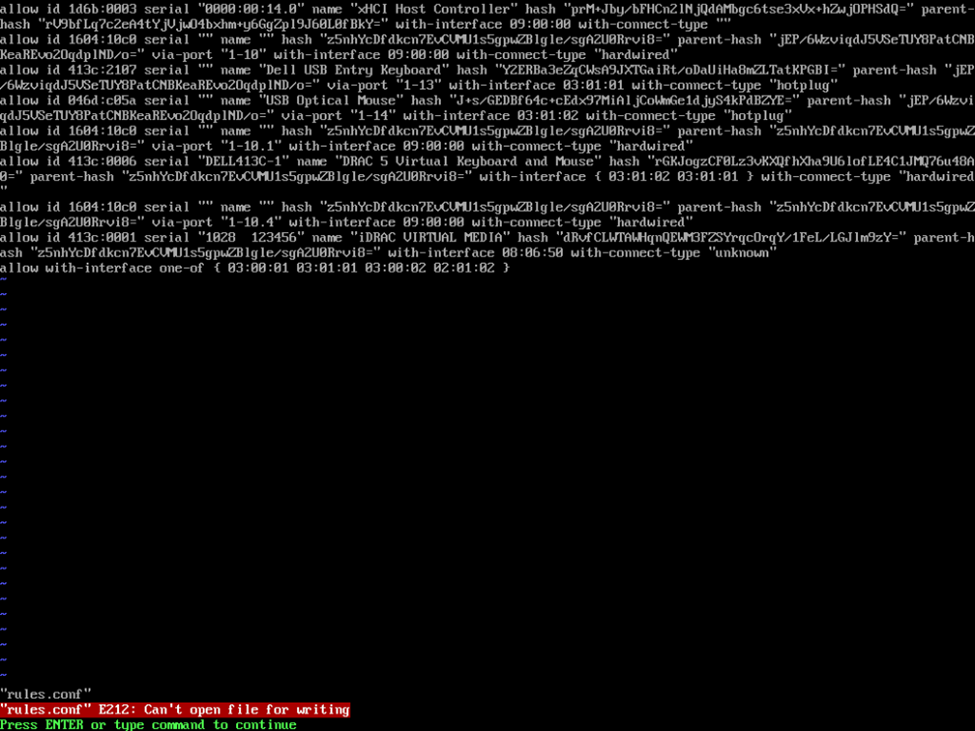
Again, google to the rescue here as I suspected the filesystem may have been mounted as read only and I found that by issuing a mount command to remount the root file system as read/write, I was able to modify the configuration file as expected.
mount -o remount,rw /
vi /etc/usbguard/rules.conf
We’re almost there….if you’re using the vi editor, press “insert” to change to edit mode, go to the last line, press enter and then add the below entry. In this case, I believe 03:00:01 and 03:01:01 are for keyboard HID (human interface devices) while 03:00:02 and 03:01:02 are for mouse HIDs. More information on the USBGuard rule language can be found in their documentation. In my case, I’m allowing both, so after adding the entry, press escape to enter command mode and use the command “:wq” to write and quit and be returned to the shell.
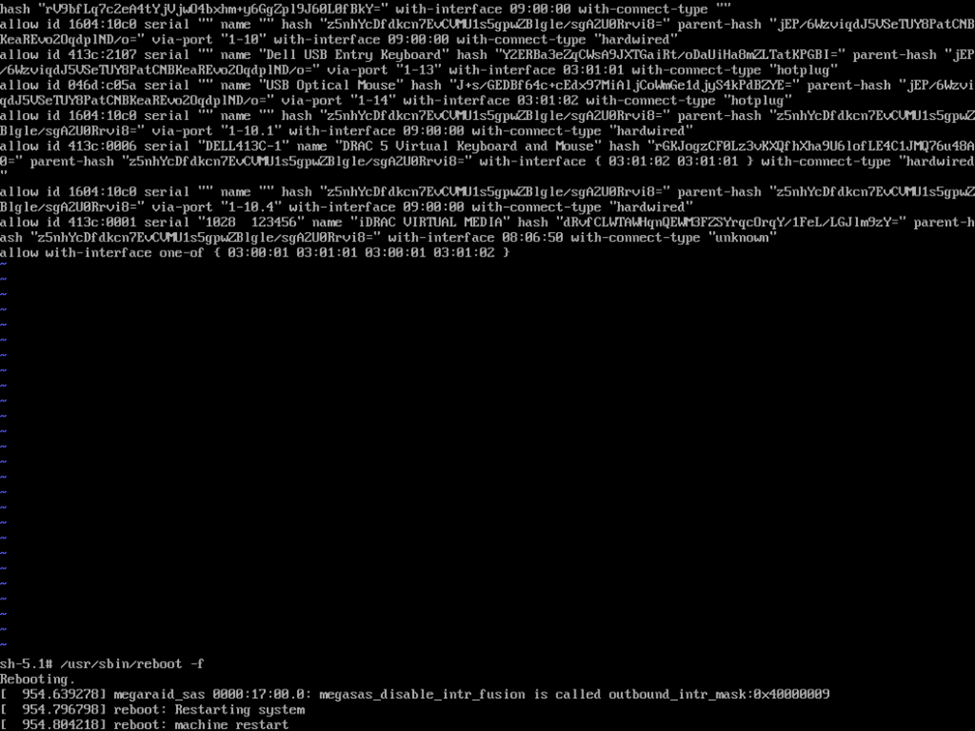
allow with-interface one-of { 03:00:01 03:01:01 03:00:02 03:01:02 }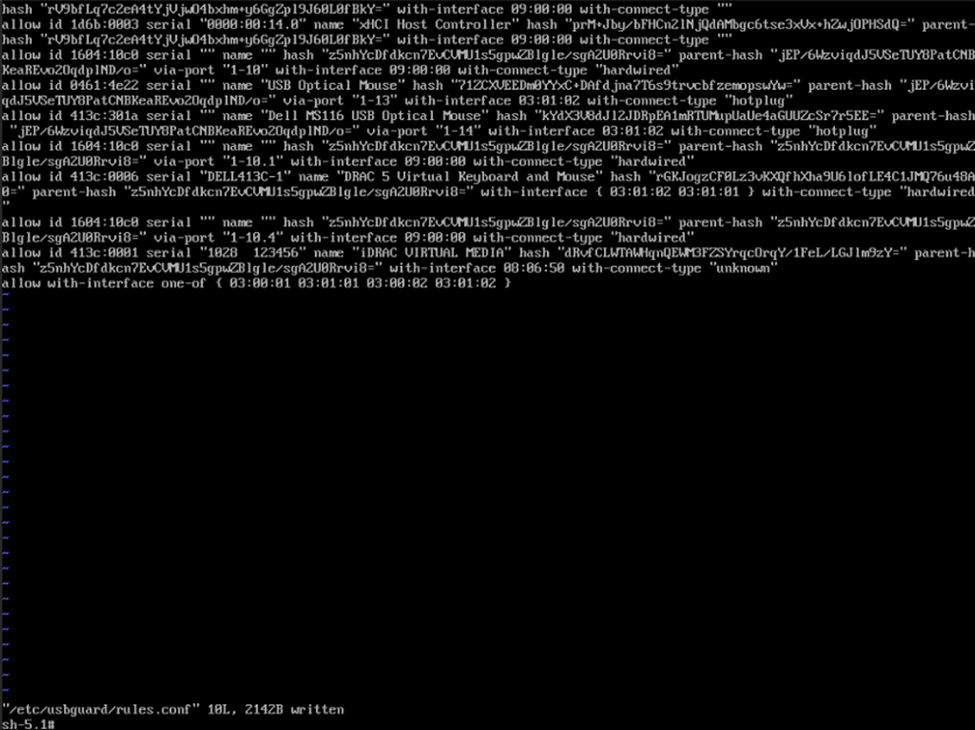
After this, it’s a simple shell command to reboot the OS, /usr/bin/reboot -f.
Upon rebooting, when I plugged in what was formerly an unauthorized keyboard, I was greeted with a message stating that a new USB device was plugged in, identified it, and I was able to type normally. My only hope is that Veeam is able to automate the process of allowing additional keyboard and mouse devices after the STIG is applied to harden the OS so that I don’t have to do this every time, or that we’re able to automate the entry when deploying the VHR appliance in v13, but for now, this looks like the workaround/solution needed.